Recently I #GotMyUHK. If you don't know what the Ultimate Hacking Keyboard is, maybe you should go check out their site, and probably buy a UHK.
At least, if you're serious about your computer peripherals, and want ones that will last you a very long time. I'm banking on this keyboard lasting the rest of my (hopefully) long life.
Anyway, as I was scrolling through Twitter, hearting every other #GotMyUHK post that I could (I really love my UHK, can you tell?), I came across a thread asking about a carrying case for the UHK. My intial thought was, "Ooo, I actually really kind of want one!" I'm also a maker, and I've been watching Adam Savage (of MythBusters fame) making lots of different boxes on his YouTube channel, Tested. So I thought, "Hey, I bet I could make my own!"
This is that story.
One of the things that I've really started doing recently is trying to properly design the things that I want to build. I took a prototyping class on Instructables, and just watching Adam design things is such a delight and an inspiration. I recently watched him build a case for Eric Idle's guitar, and it was so delightful to watch his passion, as well as how well he worked with this foam to build the guitar case. I had this idea that of course I could do it in wood, but I've actually never made a box out of wood before. However, a couple of days previous I made myself a couple of box files out of cardboard. A sharp snap knife and a cutting mat make a lot of things possible. And some tape, or glue, of course.
So I grabbed a cardboard box and started cutting. I forgot to take pictures of this process, but it's actually super straight forward! If you've ever made one of those paper dice as a child, where you have a piece of paper that's something like this:
           +------+
           |      |
           |      |
    +------+------+------+------+
    |      |      |      |      |
    |      |      |      |      |
    +------+------+------+------+
           |      |
           |      |
           +------+
That you just glue or tape together to make a die... that's pretty much
what I did here. I needed to make a couple of more folds, so mine looked
more like this:
           +------+
           |      |
           |      |
           +------+
       +-+-+------+-+-+
       | | |      | | |
       | | |      | | |
       +-+-+------+-+-+
           +------+
           |      |
           |      |
           +------+
But all I had to do was cut that out of some cardboard to measure with the
pieces of foam that I had (I think maybe it was from a computer tower I had
shipped to me?). Then I folded it up, fastened the corners with tape (I used
Scotch/cello tape to start out with, then packing tape for a stronger hold).
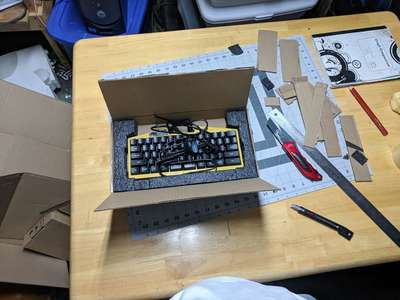
Well, not bad! At this point I can pick it up, hold it, get a feel for the thing that's real. There's something that I really enjoy about holding it in my hands.
But my work isn't over. The flaps kind of flop open and it's not a very comfortable thing to hold. The first thing I tried was a couple of pieces of old pants that I had. (Sidenote: I really hate throwing things away. I get that from my mom's mom who was a child of the Depression - though she took things to extremes and would make us eat watermelon rinds down to the white, yuck! But I've discovered that I'm a lot more willing to get rid of old pants if I can turn them into something useful... like a pen case for my journals!)
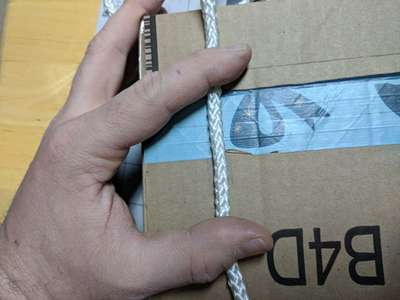
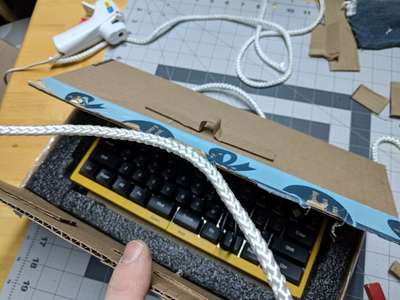
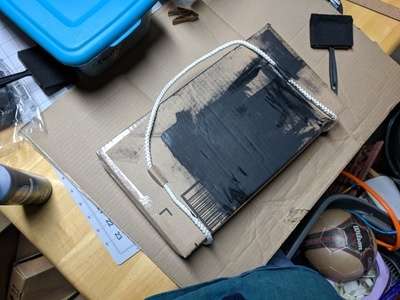
The denim that I had just wasn't the right size, but I do have lots and lots of rope. And this cheap stuff would be perfect for a handle! I wasn't worried about cutting it up, and because it's nylon it will melt really well so the ends won't fray. But for now, just a square not to get a test fit.
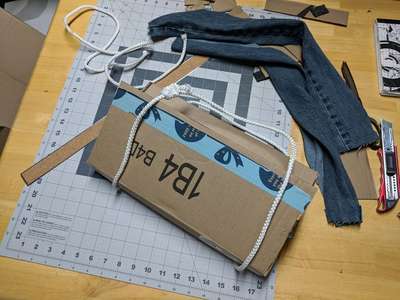
Initially I thought about just using a short piece of rope and fixing it to the top of the box, like I might with the handle for the wooden case when(?) I make that. However, this is just cardboard, and I want to make sure I don't drop my keyboard. With the rope going down the sides and under the bottom of the case like this, my case has to overcome the test weigh of this rope, which is at least 40lbs. I figure that if I'm putting 40 lbs on this handle I have bigger problems.
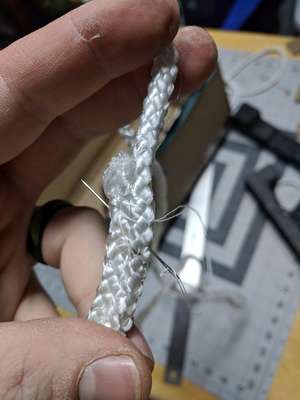
I learned from watching Steampunk'd on Netflix that hot glue works shockingly well for fabric, so rather than trying to light my rope on fire to fuse the ends I decided to just use hot glue. That worked great for fusing the ends of my rope, but I still needed to make a loop - the square knot wasn't a really great solution - it was too big and bulky and slippery. And I didn't trust hot glue to be that mechanically sound. Sew I took a different approach.
Enter the Needle (and thread)
I just grabbed a needle & thread - about 6' of it, because that's how tall I am, doubled it up, and started sewing. This rope had a fairly loose weave, so it was really easy to sew. To start off I always go in one side and out the other and then circle back around. Usually that works well enough no matter how slippery the material. Then I just zig-zagged back and forth until I used up all of my thread. Once I got near the end, I doubled back around again a few times. Then to end it I pushed the needle as far as I could in one direction and still be able to pull it out. Then I snipped the thread, which will pull a bit back into the rope and should be nice and secure and hidden from view.
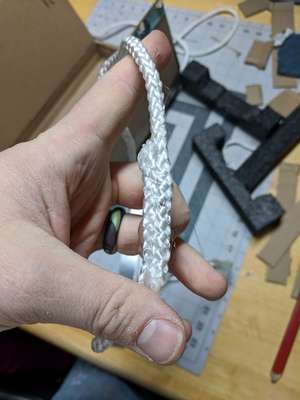
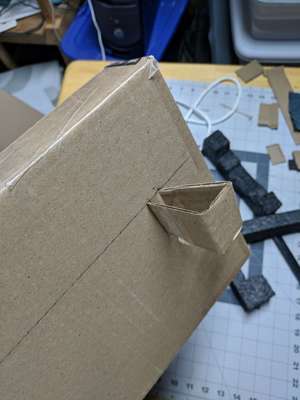
Once I had my loop of rope I had to decide exactly where I wanted my rope to fit. Too close to the center and my case will be off balance, and too far to the edges and I risk tearing or my handles won't have enough slack. About an inch and a half from the edge of the lid seemed like it would work well. So I just marked with a pencil where I needed to cut some slits.
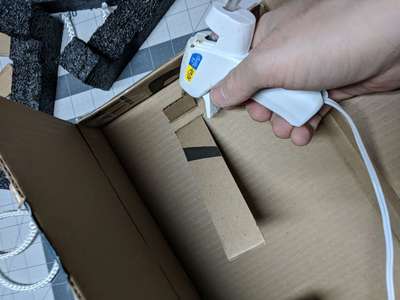
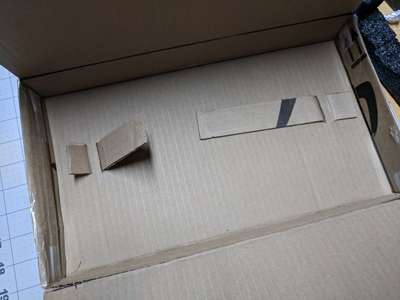
Then it was just a matter of cutting the slots and some strips of cardboard to go in them. I cut them to the width of my ruler, because that was really easy to measure and cut against. I found that it worked best to shove the slats in to get them started, and then pull one side out and stick the rope in. Then it was just a matter of gluing the straps down with some hot glue. A couple of places I had to trim them down because they stuck out too far, but that didn't take much effort.
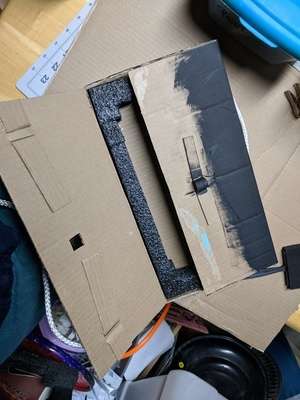
The last thing I did was put down a little hot glue for the foam. I didn't use much, in part because friction held it so well, but also in part because I'm entertaining plans to re-use this foam when I make my wooden case.
Because I was using cardboard from my Amazon box, I wasn't able to get really nice neat folds. And because of that, the lids kept tenting open. Tenting may be good for keyboards and some campers (I prefer a hammock and a tarp, thank you.), but it's terrible for keyboard cases. I just cut a little hole on my outer flap, and glued a little loop on my inner flap. Because this is really just there to keep the lid closed when it's sitting there (the straps take care of it normally), I didn't feel the need to cut slits and do like I did with the rope straps. Just glue was enough. Then a small strip of folded up cardboard shoved in the loop when it's closed worked great.
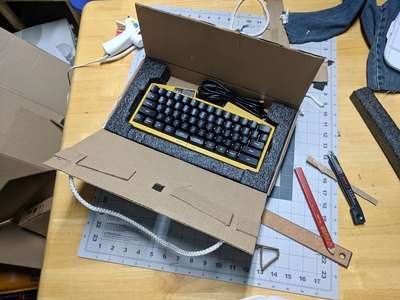
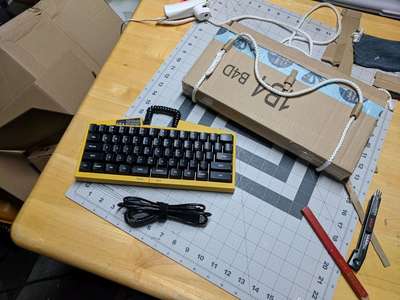
I was super happy with how this turned out. It's a case that's sturdy enough that I feel fine just throwing it in the back of the car, but light enough that it's easy to carry around. I actually just recently took a trip to Tulsa and this was a great method to pack my UHK. I mean, I only took it out to the car and then into the place we stayed, but it kind of worked perfectly. It took me 60s to pack my keyboard back into this case - unplugging the wires, wrapping them up, case closed. I wasn't trying to go fast, so I could probably get that down if I was really into speed. I'm really happy with how my case turned out, especially considering that it was made entirely from supplies I had on hand!
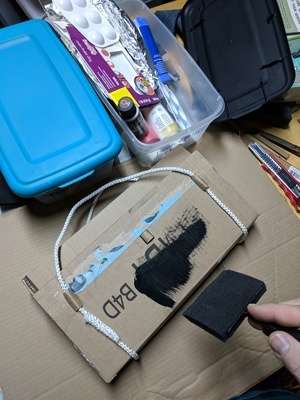
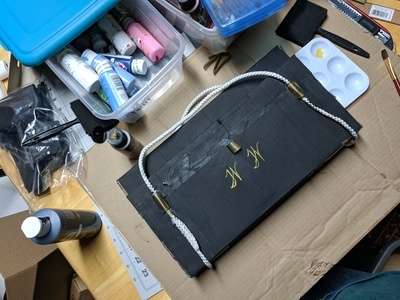
The final thing that I decided to do after my case worked so well on my trip was to give it a bit of polish. I took some cheap craft paint that I had and painted my case black, and I had some metallic brown(?) paint. I was hoping to make the metallic paint a bit brighter, so I painted with just some yellow paint first. It doesn't *quite* look like real metal hardware, but I do rather like the look. The one thing I did notice though is that the tape does a great job at rejecting the paint. I'll have to maybe tape on top of that with some masking tape or something so it will do a better job of taking the paint.
Home or Back to top